Manage tracks
Managing tracks involves handling the number, organization, and appearance of tracks in the project.
Add a track
Adding a track allows you to create a blank track, which you can use to start a new recording, move existing clips, annotate audio, or adjust speed and pitch.
To add a track:
-
Go to Tracks > Add New.
-
Select the type of track to add:
-
To record in mono, select Mono Track.
-
To record in stereo, select Stereo Track.
-
To label audio, select Label Track.
-
To adjust speed and pitch changes, select Time Track.
-
Delete a track
Deleting a track allows you to erase an existing track from a project.
To delete a track:
-
On the Track control panel, click the X button.

Name a track and clip
Naming a track allows you to identify and better organize the tracks in your project.
Name a track
To name a track:
-
On the Track control panel, click the Track dropdown menu.

-
Select Name.
-
In the dialog box’s Name field, enter the track name.

-
Click OK.
Name a clip inside a track
To name a clip inside a track:
-
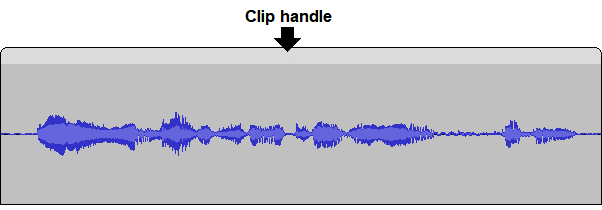
Double-click the clip handle.

-
In the clip handle, enter the clip name.
-
Press Enter .
Move a track
Moving a track allows you to change a track’s position in the project window.
To move a track:
-
On the Track control panel, click the Track dropdown menu.

-
Select where you want to move the track:
-
To move the selected track above the track that’s currently above it, select Move Track Up.
-
To move the selected track below the track that’s currently below it, select Move Track Down.
-
To move the selected track above all other tracks in the project, select Move Track to Top.
-
To move the selected track below all other tracks in the project, select Move Track to Bottom.
-
Collapse a track
Collapsing a track allows you to minimize a track’s waveform in the project window.
To collapse a track:
-
On the Track control panel, click the upwards arrow button.

Note
A collapsed track will still play during playback if it’s not muted.
To expand a track:
-
On the Track control panel, click the downwards arrow button.

Change track size
Changing track size allows you to extend and condense the track contents.
To change track size:
-
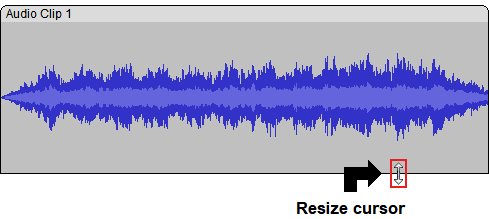
Hover over the track’s bottom border so that the cursor turns into a resize cursor.

-
Drag the track’s bottom border until you reach the desired size:
-
To increase the track size, drag the bottom border down.
-
To decrease the track size, drag the bottom border up.
Note
Changing the track size will also change the size of the Vertical scale. To make the Vertical scale easier to read, increase the track size.
-
Change waveform color
Changing waveform color allows you to change a track’s waveform colour to blue, red, green, or black. This is useful for identifying and organizing different voices, instruments, or songs in a project.
To change waveform color:
-
On the Track control panel, click the Track dropdown menu.

-
Select Wave Color.
-
Select the waveform color:
-
To change the color to blue, select Instrument 1.

-
To change the color to red, select Instrument 2.

-
To change the color to green, select Instrument 3.

-
To change the color to black, select Instrument 4.

Note
If you move a clip into a different track with a different waveform color, the clip will still retain its waveform color.
-